


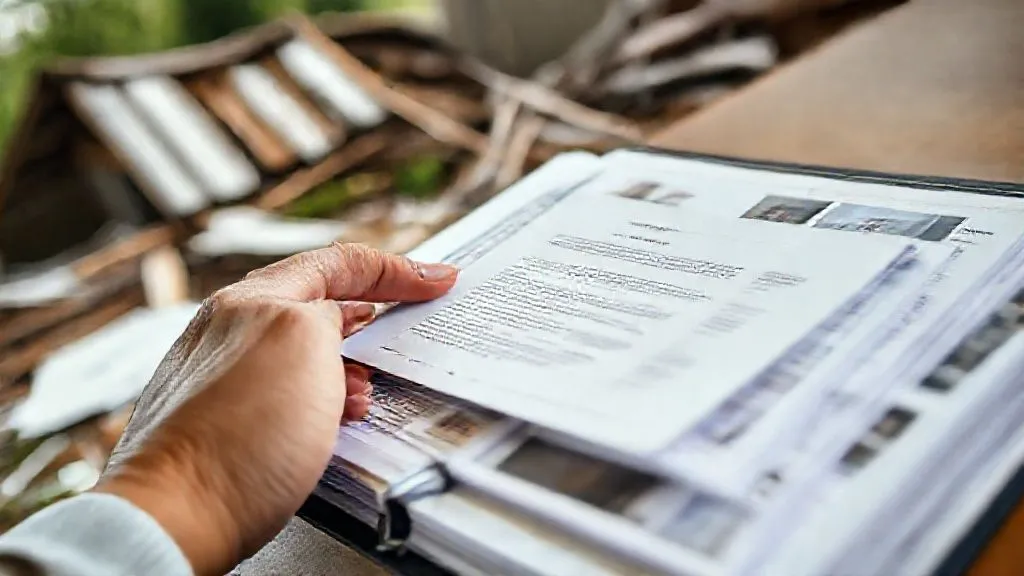
What specific actions minimize post-disaster insurance claim denials?
For over two decades in the intricate world of insurance and risk management, I've witnessed firsthand the devastating aftermath of natural disasters. Beyond the physical destruction, there's often a secondary wave of trauma: the battle with insurance companies over claim denials. It's a heartbreaking scenario I've seen countless times – policyholders, already reeling from loss, face an uphill struggle to get the financial support they desperately need.
The pain point is palpable: you've paid your premiums diligently, trusting that your policy would be your safety net. Yet, when disaster strikes, many find themselves caught in a bureaucratic tangle, facing unexpected rejections or lowball offers that simply don't cover their losses. This isn't just about money; it's about rebuilding lives, restoring peace of mind, and ensuring your community can recover.
But here's the crucial insight I want to share: claim denials are not inevitable. In fact, many can be prevented with proactive planning and informed action. In this definitive guide, I'll walk you through the precise, actionable frameworks and expert strategies I've honed over years of experience, empowering you to navigate the post-disaster claims process with confidence and significantly minimize your risk of denial. We’ll explore what specific actions minimize post-disaster insurance claim denials, transforming a potential nightmare into a manageable recovery.
The Foundation: Pre-Disaster Preparedness is Your First Defense
The battle against claim denials begins long before any storm clouds gather or ground shakes. It starts with meticulous preparation. Think of it as building an unshakeable fortress around your future claim. I've often seen policyholders skip these critical steps, only to regret it when they're scrambling for information after an event.
1. Understand Your Policy Inside and Out
Your insurance policy is not just a stack of papers; it's a legal contract. Many denials stem from a fundamental misunderstanding of what's covered and, more importantly, what's excluded. Don't wait until disaster strikes to read the fine print.
- Request a Comprehensive Copy: Always have an up-to-date copy of your policy, including all endorsements and declarations pages. Store it digitally (cloud storage, encrypted USB) and in a waterproof, fireproof physical safe off-site.
- Review Coverage Limits: Understand your dwelling, personal property, additional living expenses (ALE), and liability limits. Are they sufficient to rebuild your home and replace your belongings at today's costs?
- Identify Exclusions: This is paramount. Does your standard homeowners policy exclude flood or earthquake damage? Do you have specific riders for these perils? Are there exclusions for certain types of mold, wear and tear, or specific materials?
- Understand Deductibles: Know your deductibles for different perils (e.g., hurricane, wind/hail, standard). A higher deductible means you pay more out of pocket before coverage kicks in.
- Ask Questions: If anything is unclear, contact your agent or insurer directly. Document these conversations, noting dates, names, and key takeaways.
As a seasoned professional, I always advise clients to conduct an annual policy review. It’s a small investment of time that can save you millions in potential losses and countless headaches. According to the National Association of Insurance Commissioners (NAIC), understanding your policy is the single most important step in preparing for a claim. The NAIC website offers excellent consumer guides.
2. Document Your Valuables and Property Condition
Proof of loss is the cornerstone of any successful claim. Without it, you're relying on your word against the insurer's assessment, which rarely ends well. This is where comprehensive documentation becomes your most powerful ally.
- Create a Home Inventory: Go room by room and list every significant item. Include make, model, serial number, purchase date, and estimated value.
- Photographic & Video Evidence: Take clear, well-lit photos and videos of every room, inside and out. Focus on high-value items, unique features, and the general condition of your property. Pay attention to areas that are prone to damage (e.g., roof, foundation, windows).
- Keep Receipts: For high-value purchases, major renovations, or significant repairs, retain original receipts or digital copies. This validates ownership and cost.
- Store Off-Site: Crucially, all this documentation (inventory, photos, videos, receipts) must be stored securely off-site, preferably in cloud storage or a safe deposit box. A fire that destroys your home will also destroy your on-site records.
"The most common reason for claim disputes isn't malicious intent; it's a lack of verifiable proof. Document everything as if you'll need to prove every single item's existence and value." - Industry Veteran Insight
This proactive documentation is one of the most vital specific actions minimize post-disaster insurance claim denials. It turns 'he said, she said' into 'here's the undeniable evidence.'

Immediate Post-Disaster Actions: Securing the Scene and Your Claim
Once disaster strikes, your immediate actions are critical. They not only protect your remaining property but also lay the groundwork for a smooth claim process. Panic is a natural reaction, but a clear head and a plan can make all the difference.
1. Prioritize Safety and Mitigate Further Damage
Your safety and the safety of your family are always paramount. Once you're safe, focus on preventing further damage to your property. This is often a condition of your policy.
- Ensure Personal Safety: Evacuate if necessary. Do not re-enter damaged property until authorities deem it safe.
- Prevent Secondary Damage: Take reasonable steps to protect your property from further harm. This might include boarding up broken windows, tarping a damaged roof, or shutting off utilities (water, gas, electricity) to prevent leaks, fires, or electrocution.
- Document Mitigation Efforts: Take photos and videos of the damage before you start mitigation, and then document your mitigation efforts. Keep all receipts for materials and services used (tarps, plywood, temporary repairs).
Failing to mitigate further damage can lead to a partial or full denial for the additional damage that occurred due to your inaction. Insurers expect you to act responsibly, as if you had no insurance at all.
2. Notify Your Insurer Promptly
Timely notification is non-negotiable. Most policies require you to notify your insurer "as soon as reasonably possible" or within a specific timeframe.
- Contact Your Agent/Insurer: Use the dedicated claims line. Have your policy number ready.
- Provide Initial Details: Briefly describe the nature of the disaster, the date of loss, and the extent of the damage (to the best of your knowledge).
- Get a Claim Number: Make sure you receive a claim number immediately. This will be your primary reference for all future communications.
- Document the Call: Note the date, time, name of the representative, and a summary of the conversation.
A delay in reporting can be used by an insurer to argue that the damage worsened due to your late notification, potentially impacting your payout.
Meticulous Documentation: The Unsung Hero of Successful Claims
This cannot be stressed enough: documentation is your bedrock. Post-disaster, your pre-existing inventory is invaluable, but you now need to document the damage itself. This is where many claims falter, leading to protracted disputes or denials.
1. Comprehensive Damage Assessment
As soon as it's safe, conduct a thorough assessment of all damage. This will be more detailed than your initial notification.
- Photo and Video Evidence (Post-Damage): Systematically photograph and video every single damaged item and area. Get wide shots, close-ups, and multiple angles. Narrate your videos, pointing out specific damage.
- Separate Damaged from Undamaged: Do not dispose of damaged items until your adjuster has seen them, or you have explicit permission. If you must move them, photograph their original location and the items themselves.
- Detailed Written Log: Maintain a running log of all damage, room by room. Include descriptions, estimated repair/replacement needs, and cross-reference with your photos/videos.
I've seen claims worth hundreds of thousands of dollars turn on the quality of photographic evidence. It's not just about showing damage; it's about proving its extent and cause.
2. Maintain a Detailed Communication Log
Every interaction with your insurance company, adjuster, or contractors needs to be meticulously recorded.
| Date | Time | Contact Person | Method | Summary | Follow-up Needed |
|---|---|---|---|---|---|
| 10/26/2023 | 10:30 AM | Sarah Jenkins (Adjuster) | Phone Call | Discussed initial damage report, scheduled site visit for 11/02. Claim #12345. | Confirm visit. |
| 10/27/2023 | 09:15 AM | Claims Dept. (Email) | Sent requested photos of roof damage. Attached 25 images. | Confirmation of receipt. | |
| 11/02/2023 | 02:00 PM | Sarah Jenkins (Adjuster) | On-Site Visit | Adjuster inspected property. Agreed on roof and interior water damage. Discussed ALE. | Await estimate. |
This log is your defense against "he said, she said" scenarios. It provides an indisputable timeline of events and agreements.
Case Study: The Ramirez Family's Flood Claim
The Ramirez family in Florida experienced significant flood damage to their home. Initially, their insurer offered a low settlement, citing insufficient proof of personal property value. However, because the Ramirezes had diligently followed my advice:
- They had a pre-disaster video inventory of their home, clearly showing all furniture, electronics, and unique art pieces.
- They had kept digital copies of receipts for major appliances and a custom-built entertainment unit.
- Post-flood, they meticulously photographed every damaged item, separating them into categories before disposal.
When faced with the low offer, they presented their comprehensive documentation. The adjuster, seeing the undeniable evidence, quickly revised the settlement upwards by nearly $75,000. This resulted in a full and fair recovery, avoiding a lengthy dispute. Their adherence to detailed documentation was the specific action that minimized a potential claim denial and maximized their payout.
Navigating the Adjuster Process: What to Expect and How to Respond
The insurance adjuster is a critical figure in your claim. They represent the insurer's interests, and while many are fair, their primary role is to assess damage and determine coverage based on your policy. Your interaction with them can significantly impact your claim's outcome.
1. Preparing for the Adjuster's Visit
Treat the adjuster's visit as a formal meeting. Be prepared and professional.
- Have All Documentation Ready: Your home inventory, pre-disaster photos/videos, post-disaster damage photos/videos, receipts for mitigation, and your communication log.
- Walk-Through Plan: Know exactly what you want to show the adjuster. Have a mental (or written) checklist of all damaged areas and items.
- Be Present and Engaged: Accompany the adjuster during their inspection. Point out all damage, even minor issues you think they might overlook. Ask questions.
"Never assume the adjuster will see everything. It's your property, your loss. Be your own best advocate and guide them through every detail." - Expert Advice on Adjuster Visits
2. What to Say and What Not to Say
Your words matter. Be factual, not emotional.
- Stick to Facts: Describe the damage and how it occurred. Avoid speculating about causes or making definitive statements about coverage.
- Do Not Admit Fault: Even if you think you might be partially responsible for some damage (e.g., leaving a window open), do not admit fault unless it's undeniable. Let the investigation determine causality.
- Don't Rush to Sign: Never sign any documents presented by the adjuster on the spot without fully understanding them. You have the right to review documents and seek legal counsel if needed.
- Request a Copy of Their Report: After their visit, request a copy of the adjuster's report and estimate. This allows you to compare their findings with your own documentation.
A study by the Insurance Information Institute (III) highlights that clear, factual communication significantly speeds up the claims process and reduces disputes. The III website provides valuable resources for policyholders.

Understanding Your Policy: Unlocking Its Full Potential
I mentioned this in pre-disaster preparedness, but it bears repeating with more depth. A thorough understanding of your policy isn't just about avoiding denials; it's about maximizing your eligible recovery. Many policyholders leave money on the table simply because they don't know all the benefits available to them.
1. Beyond the Obvious: Additional Coverages
Your policy might include coverages you're not even aware of, which can be crucial after a disaster.
- Additional Living Expenses (ALE): If your home is uninhabitable, ALE covers temporary housing, food, and other increased living costs. Understand its limits and duration.
- Debris Removal: Covers the cost of clearing fallen trees, damaged structures, and other debris from your property.
- Building Code Upgrades: If local codes require upgrades during rebuilding (e.g., stronger hurricane strapping), your policy might cover the increased cost, often called "Ordinance or Law" coverage.
- Contents Replacement Cost vs. Actual Cash Value (ACV): A key distinction. Replacement Cost Value (RCV) pays for new items, while ACV depreciates items based on age and wear. RCV policies are almost always preferable for personal property.
One of the most impactful specific actions minimize post-disaster insurance claim denials is knowing these hidden gems in your policy. They can be the difference between merely surviving and truly recovering.
2. The Importance of Endorsements and Riders
Endorsements are additions to your policy that modify or expand coverage. They are critical for unique risks.
- Flood/Earthquake Insurance: Often separate policies or endorsements. Essential for properties in at-risk zones.
- Sewer Backup/Sump Pump Overflow: Standard policies typically exclude this; a rider is needed.
- Identity Theft Protection: Some policies include this, offering resources if your identity is stolen during a disaster.
Reviewing your policy annually with your agent allows you to add or adjust endorsements as your needs or local risks change. This proactive approach significantly reduces the chance of a "not covered" denial.
When Things Go Wrong: Appealing a Denied Claim
Despite your best efforts, a claim denial can still happen. This is not the end of the road. You have rights, and there are specific steps you can take to appeal the decision.
1. Understand the Reason for Denial
Your insurer must provide a clear reason for denial, usually in writing. This letter is your starting point.
- Review the Denial Letter: Carefully read the letter. It will cite specific policy language or exclusions.
- Compare with Your Policy: Cross-reference the cited sections with your own policy document. Do you agree with their interpretation?
- Identify Discrepancies: Look for areas where your documentation contradicts their findings or where their interpretation seems incorrect.
Many denials are based on a lack of information or a misunderstanding. Your job is to provide the missing pieces or correct the misunderstanding.
2. Build Your Appeal and Submit Additional Evidence
An appeal is essentially a re-argument of your claim, backed by more robust evidence.
- Gather All Supporting Documentation: This includes your original inventory, pre/post-disaster photos/videos, receipts, repair estimates from contractors, and your communication log.
- Write a Detailed Appeal Letter: Clearly state why you believe the denial is incorrect. Reference specific policy language and present your evidence methodically. Be professional and factual.
- Include Independent Estimates: If the insurer's estimate was too low, get multiple independent estimates from reputable contractors for repairs or replacement.
- Consider a Re-inspection: Request a re-inspection by a different adjuster if you believe the initial assessment was flawed.
The National Association of Public Insurance Adjusters (NAPIA) emphasizes that a well-documented appeal significantly increases the chances of a reversal. NAPIA offers resources for consumers seeking public adjusters.

Leveraging Professional Help: Public Adjusters and Legal Counsel
Sometimes, the complexity of a claim or the intransigence of an insurer warrants bringing in external experts. This is a strategic move, not a sign of weakness, and can be one of the most effective specific actions minimize post-disaster insurance claim denials.
1. Public Adjusters: Your Advocate
Unlike adjusters hired by your insurer, public adjusters work exclusively for you, the policyholder. They are licensed professionals who specialize in evaluating property damage and negotiating claims with insurance companies.
- When to Consider: If your claim is complex, involves significant damage, the insurer's offer is low, or you're simply overwhelmed, a public adjuster can be invaluable.
- Their Role: They will conduct an independent assessment of your damage, prepare detailed estimates, handle all communications with your insurer, and negotiate on your behalf.
- Fees: Public adjusters typically work on a contingency basis, taking a percentage (e.g., 10-15%) of the final settlement. Ensure you understand their fee structure upfront.
"A good public adjuster doesn't just get you more money; they level the playing field, ensuring your voice is heard and your claim is properly valued." - Advice from a Public Adjuster Expert
2. Legal Counsel: When All Else Fails
If your claim is still denied after appeal, or if you suspect bad faith on the part of your insurer, consulting an attorney specializing in insurance law may be necessary.
- Bad Faith Claims: This occurs when an insurer unreasonably delays, denies, or underpays a claim without proper investigation or justification.
- Legal Recourse: An attorney can review your policy and claim, advise on your legal options, and represent you in negotiations or litigation.
- Statutes of Limitations: Be aware that there are time limits (statutes of limitations) for filing lawsuits, which vary by state. Don't delay seeking legal advice if you believe it's warranted.
While taking legal action is a last resort, knowing it's an option provides leverage and ensures you exhaust all avenues for a fair settlement. Forbes consistently highlights the importance of legal review in complex insurance disputes. You can find many articles on insurance law on Forbes.com.
Frequently Asked Questions (FAQ)
Q: How long does an insurer have to process my claim? A: This varies by state. Most states have regulations requiring insurers to acknowledge a claim within 10-15 business days and provide a decision (approval, denial, or request for more info) within 30-60 days. Check your state's Department of Insurance website for specific timelines.
Q: Can my rates go up if I file a claim? A: Yes, filing a claim can potentially impact your premiums, especially if it's a "minor" claim or if you've had multiple claims in a short period. However, for large-scale natural disasters, many states or insurers may have rules preventing rate hikes solely based on specific catastrophic events. Never let fear of a rate increase prevent you from filing a legitimate claim for significant damage.
Q: What if I disagree with the adjuster's estimate? A: This is common. Don't accept it if you believe it's too low. Get independent estimates from reputable contractors. Present these estimates to your insurer, along with your detailed documentation, and explain why you believe their estimate is insufficient. This is where a public adjuster can be very helpful in negotiating.
Q: Should I start repairs before the adjuster sees the damage? A: Generally, no. You should only undertake emergency mitigation to prevent further damage (e.g., tarping a roof). Do not start permanent repairs or dispose of damaged items until the adjuster has inspected everything and you have their approval, or you risk the insurer denying coverage for those repairs. Always document mitigation efforts thoroughly.
Q: My policy states 'Actual Cash Value' for personal property. How does that impact my payout? A: Actual Cash Value (ACV) means the insurer will pay for the depreciated value of your items, not what it costs to replace them new. For example, a 5-year-old TV might only be worth a fraction of its original purchase price. To maximize your ACV claim, provide purchase dates, original costs, and any evidence of the item's condition before the loss. If you have Replacement Cost Value (RCV) coverage, you typically receive the ACV first, and then the difference once you replace the items.
Key Takeaways and Final Thoughts
Navigating the aftermath of a disaster is undoubtedly one of life's most challenging experiences. However, armed with the right knowledge and a proactive mindset, you can significantly reduce the stress and financial burden associated with insurance claims. Remember, your insurance policy is a promise, and you have every right to expect that promise to be fulfilled.
- Proactive Preparation is Paramount: Understand your policy, document your assets, and store records off-site well before disaster strikes.
- Act Swiftly and Safely Post-Disaster: Mitigate further damage and notify your insurer immediately, documenting every step.
- Document Everything, Meticulously: Photos, videos, logs, and receipts are your indisputable evidence.
- Engage with Your Adjuster Strategically: Be prepared, factual, and assertive in presenting your case.
- Know Your Rights and Options: Don't hesitate to appeal a denial or seek professional help from public adjusters or legal counsel when needed.
By taking these specific actions to minimize post-disaster insurance claim denials, you're not just protecting your property; you're safeguarding your future and empowering your recovery. Be prepared, be persistent, and be your own best advocate. The peace of mind that comes from a successful claim is invaluable, allowing you to focus on what truly matters: rebuilding and moving forward.
Recommended Reading
- Is PPLI Right for High Net Worth Families? The Definitive Guide
- Denied LTC Claims? 7 Steps to Appeal Assisted Living Coverage
- How to Prove ERM ROI to Skeptical Boards: 7 Actionable Strategies
- How to Ensure CGL Covers Subcontractors' Negligence: 7 Expert Steps
- 7 Steps: Resolve Classic Car Agreed Value Disputes Post-Total Loss





Your email address will not be published. Required fields are marked *