


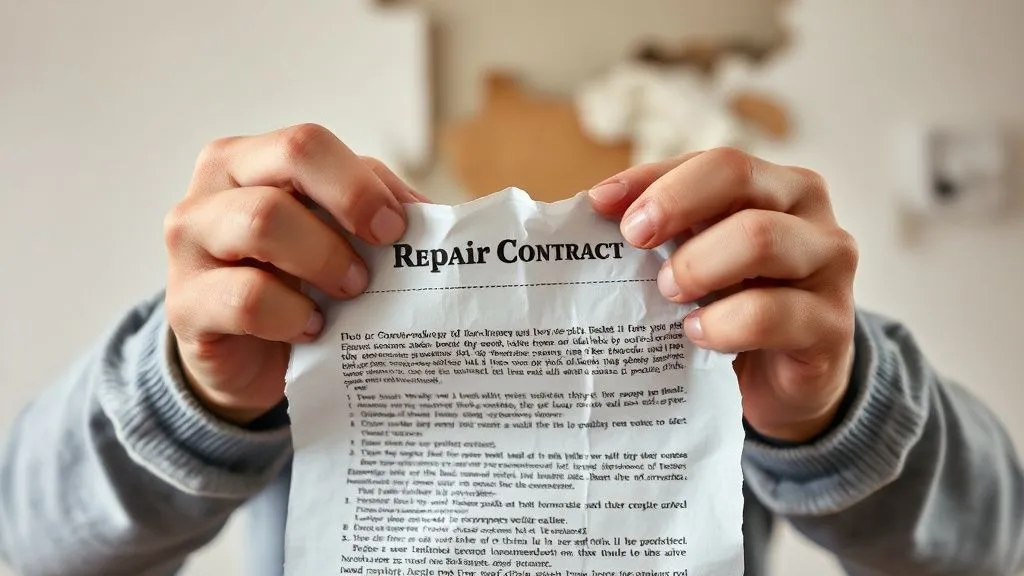
What to do when dwelling repair contractor delivers poor quality?
For over 15 years in the home insurance sector, I've witnessed firsthand the devastating impact of poor-quality dwelling repairs. It's a scenario no homeowner ever wants to face: you hire a professional, trust them with your most valuable asset, and instead of a solution, you're left with new problems, added stress, and often, significant financial burden. I've seen countless families grapple with the aftermath, from leaky roofs after a supposed fix to structural issues masked by cosmetic cover-ups.
The problem isn't just cosmetic; shoddy workmanship can compromise your home's safety, efficiency, and long-term value. It erodes trust, creates immense frustration, and leaves you wondering who to turn to next. You've invested time, money, and emotional energy, only to find yourself in a worse position than when you started. This isn't just about a bad paint job; it's about the integrity of your home and your peace of mind.
But here's the crucial insight: you are not powerless. This guide will provide you with a definitive, actionable framework to navigate the complex landscape of poor-quality dwelling repairs. We'll explore everything from meticulous documentation and engaging your insurance provider to understanding your legal rights and ensuring a proper resolution. My goal is to equip you with the knowledge and confidence to effectively address the question: what to do when dwelling repair contractor delivers poor quality?
Immediate Steps: Document Everything Meticulously
When you discover poor quality work, your immediate reaction might be anger or despair. However, the most critical first step is to channel that energy into methodical documentation. In my experience, the difference between a successful resolution and a drawn-out, frustrating battle often hinges on the quality and completeness of your records. Think of yourself as building a bulletproof case.
The Power of Photographic and Video Evidence
Pictures and videos speak volumes. They provide irrefutable proof of the condition before, during, and after the repair, highlighting specific deficiencies. Don't just take one or two; capture the poor workmanship from multiple angles, at different times of day, and with varying light conditions. Use a ruler or common object for scale if possible. Narrate videos to point out issues clearly. This visual evidence will be invaluable for discussions with your contractor, insurance company, and potentially, legal counsel.

Written Communication is Key
Beyond visuals, every interaction and observation should be recorded. This includes dates, times, names of individuals involved, and a concise summary of conversations. Never rely solely on verbal agreements. All formal complaints, requests for repair, and responses should be in writing, preferably via email or certified mail, creating a clear paper trail.
- Take "Before" Photos/Videos: If possible, document the area before any work begins to establish a baseline.
- Capture "During" Photos/Videos: If you notice issues during the process, document them immediately.
- Document "After" Photos/Videos: Once the work is supposedly complete, thoroughly document all areas of concern.
- Keep a Detailed Log: Maintain a chronological log of all communications (calls, emails, texts), site visits, and observations.
- Save All Contracts & Invoices: Keep original copies of your contract, change orders, invoices, and payment records.
- Note Witness Information: If anyone else observed the poor quality work, note their contact information and what they saw.
Understanding Your Contract and Warranty
Before you make any moves, pull out your original contract. This document is the cornerstone of your agreement and outlines the scope of work, materials to be used, timelines, payment schedules, and crucially, the warranty terms. Many homeowners overlook the fine print until a problem arises, but understanding these details is paramount when dealing with poor quality repairs.
Key Clauses to Review
Pay particular attention to sections detailing the standard of workmanship, dispute resolution mechanisms, and any clauses regarding changes to the scope of work. Does the contract specify industry standards? What are the procedures for addressing deficiencies? A well-drafted contract will often include provisions for correcting defects within a certain timeframe or outline steps for mediation or arbitration. If your contract is vague, it might make your case harder, but not impossible.
Manufacturer vs. Contractor Warranties
It's vital to distinguish between warranties offered by the material manufacturer and those provided by the contractor for their labor. For instance, a new roof might come with a 30-year manufacturer warranty on shingles, but only a 5-year warranty on the contractor's installation. If the issue stems from faulty materials, your claim might be with the manufacturer. If it's due to improper installation, your claim is with the contractor. Understanding this distinction can save you time and direct your efforts more effectively.
Expert Insight: "Your contract is more than just a piece of paper; it's your legal roadmap. I've advised countless clients that a thorough understanding of its terms, especially warranty clauses, is the first line of defense against poor workmanship. Don't just sign; read and understand every detail."
Initiating Formal Communication with Your Contractor
Once you have your documentation in order and a clear understanding of your contract, the next logical step is to formally communicate your concerns to the contractor. While emotions might be running high, it's crucial to approach this professionally and factually. The goal here is to give the contractor an opportunity to rectify the situation before escalating the matter.
The Initial Written Complaint
Send a formal letter or email outlining the specific issues, referencing your contract, and including your photographic evidence. Be precise about what constitutes the poor quality work and how it deviates from the agreed-upon standards or industry norms. Avoid accusatory language; focus on the facts and the desired outcome – correction of the defects. Keep a copy of everything you send and proof of delivery.
Setting Clear Expectations and Deadlines
In your written communication, request a meeting to discuss the issues and propose a clear timeline for the contractor to inspect the work and present a plan for remediation. Provide a reasonable deadline for their response and for the commencement of corrective work. For example, "Please respond within 7 business days and propose a plan for repair to begin within 14 business days." This demonstrates your seriousness and provides a framework for accountability.
- Review Your Documentation: Consolidate all evidence of poor workmanship.
- Draft a Formal Letter: Clearly state the issues, reference the contract, and attach supporting evidence.
- State Your Desired Resolution: Specify that you expect the work to be corrected to contract specifications.
- Set Clear Deadlines: Provide reasonable timeframes for response and remediation.
- Send via Certified Mail/Email with Read Receipt: Ensure you have proof the contractor received your communication.
- Keep Records: File all correspondence carefully.
Engaging Your Home Insurance Provider
This is where my expertise in home insurance becomes particularly relevant. Many homeowners don't immediately think of their insurance company when facing poor contractor work, but depending on the circumstances, your insurer can be a vital ally. It's not always a straightforward claim, but it's a avenue worth exploring.
When to Involve Your Insurer
Your home insurance policy primarily covers sudden and accidental damage, not typically poor workmanship itself. However, if the poor workmanship *leads to* subsequent damage that would otherwise be covered, your policy might kick in. For example, if a poorly installed roof leads to a leak that damages your interior walls, flooring, and personal property, the resulting water damage might be covered. The cost to fix the roof itself (the poor workmanship) might not be, but the consequential damage could be. This distinction is critical.
Navigating the Claims Process for Poor Work
When you contact your insurer, be very clear about the sequence of events: the original repair, the discovery of poor quality, and any subsequent damage that has occurred. Provide all your documentation – photos, videos, contractor communications. Your insurer will likely send an adjuster to assess the damage. They will determine if the damage falls under your policy's perils and if it was a direct result of the contractor's negligence or poor work. Be prepared for a detailed investigation.
Case Study: Sarah's Leaky Roof Nightmare
Sarah hired a contractor to replace her roof after a hailstorm. Six months later, during a heavy rain, she discovered significant water stains on her living room ceiling and a soaked carpet. Her initial attempts to contact the contractor were met with silence. Sarah had documented the roof replacement process and the subsequent water damage meticulously. When she contacted her home insurance provider, explaining that the water damage was a direct result of the new, poorly installed roof, they investigated. While her policy didn't cover the cost to re-do the faulty roof installation, it did cover the interior water damage – plaster repair, repainting, and carpet replacement. Her insurer then pursued subrogation against the original contractor, effectively recovering some of their payout, which indirectly pressured the contractor to address their errors. This demonstrated the crucial role insurance can play in mitigating the financial fallout.
| Step | Description | Timeline |
|---|---|---|
| Document Everything | Gather all evidence of poor work and subsequent damage. | Immediately |
| Contact Insurer | Explain the sequence: poor work leading to covered damage. | Within days of damage |
| Provide Documentation | Share photos, videos, contractor communications. | Upon request |
| Cooperate with Adjuster | Allow inspection, answer questions honestly. | As scheduled |
| Review Policy & Claim | Understand what's covered vs. not covered. | Throughout process |
Seeking Independent Professional Assessments
If your direct communication with the contractor doesn't yield a satisfactory resolution, or if the situation is complex, bringing in a neutral third-party expert can significantly strengthen your position. An independent assessment provides an unbiased, professional opinion on the quality of the work and its adherence to industry standards and building codes. This can be a game-changer in negotiations or legal proceedings.
The Value of a Third-Party Inspection
Consider hiring a licensed home inspector, a structural engineer, or a building consultant specializing in the specific type of repair (e.g., a roofing consultant for roof issues). These professionals can provide a detailed report outlining the deficiencies, potential causes, and recommended corrective actions. Their report carries significant weight and can serve as expert testimony that your contractor will find hard to dispute. Ensure the inspector is truly independent and has no affiliation with the original contractor.

Licensing Boards and Consumer Protection Agencies
Beyond individual inspectors, various official bodies exist to protect consumers. Your state's contractor licensing board (if applicable) is often the first stop. They oversee contractor licenses, investigate complaints of poor workmanship, and can impose penalties or even revoke licenses. Filing a complaint with them can trigger an investigation and put significant pressure on the contractor. Additionally, local consumer protection agencies or the Better Business Bureau (BBB) can mediate disputes and publicly record complaints, impacting the contractor's reputation. Always check a contractor's record with these bodies before hiring, and utilize them if issues arise.
According to the Federal Trade Commission (FTC), documenting everything and seeking third-party assessments are crucial steps when dealing with home improvement disputes.
Mediation, Arbitration, and Legal Recourse
If all attempts at direct resolution and third-party assessments fail to motivate your contractor to fix the poor quality work, it's time to consider more formal dispute resolution methods. These steps can be more time-consuming and potentially costly, but they offer structured avenues to achieve a resolution.
Exploring Alternative Dispute Resolution (ADR)
Before jumping to litigation, consider mediation or arbitration. Many contracts include clauses requiring ADR. In mediation, a neutral third party facilitates discussions between you and the contractor, helping you reach a mutually agreeable solution. The mediator doesn't make decisions but guides the conversation. In arbitration, a neutral third party hears both sides of the argument and makes a binding decision, similar to a court judgment. ADR is often quicker and less expensive than going to court.
When to Consult a Construction Lawyer
If ADR isn't successful, or if the damages are substantial, consulting a construction lawyer becomes essential. A lawyer can review your contract, assess the strength of your case, and advise you on the best course of action, which might include filing a lawsuit for breach of contract, negligence, or fraud. They can also help you understand the potential costs, timelines, and likelihood of success. This is a significant step, but sometimes, it's the only way to compel a recalcitrant contractor to fulfill their obligations or compensate you for damages.
Expert Insight: "While litigation is often a last resort, I've seen countless cases where the mere involvement of a construction lawyer prompts a contractor to take the poor quality issues seriously. A lawyer can articulate your rights and the contractor's obligations in a language they understand – legal terms."
For more details on construction disputes, resources like those from the American Bar Association can be invaluable.
Mitigating Further Damage and Ensuring Safety
While you're navigating the dispute resolution process, it's crucial not to let the situation worsen. If the poor quality work poses a risk to your home's structural integrity or the safety of its occupants, you must take immediate steps to mitigate further damage. This is a homeowner's responsibility, and failing to do so could impact potential insurance claims or legal outcomes.
Temporary Fixes and Emergency Measures
If, for example, a poorly installed roof is leaking, you need to take steps to stop the water intrusion – perhaps with tarps or buckets. If electrical work is faulty and creating a fire hazard, you must turn off the power to that circuit. Document these temporary fixes thoroughly with photos and notes, explaining why they were necessary. These measures are about protecting your property and family, not about permanently fixing the contractor's error. Keep receipts for any materials used for temporary repairs.

Prioritizing Your Family's Well-being
Never compromise on safety. If the poor quality work creates an unsafe living environment (e.g., unstable structures, electrical hazards, mold growth from leaks), you may need to temporarily relocate. Your insurance policy might cover additional living expenses (ALE) if your home becomes uninhabitable due to covered damage. Consult your insurer immediately if you believe your home is unsafe. Remember, while you want to resolve the contractor issue, your primary concern should always be the health and safety of your household. This proactive approach shows due diligence and protects your interests.
Choosing a New Contractor: Lessons Learned
Whether you get the original contractor to fix their mistakes or you're left to hire someone new, the experience of poor quality dwelling repair offers invaluable, albeit tough, lessons. Moving forward, the process of selecting a new contractor must be approached with heightened caution and a more rigorous vetting process. This isn't just about getting the job done; it's about restoring trust and ensuring quality.
Red Flags and Green Lights
You've seen the red flags of a bad contractor firsthand: vague contracts, poor communication, demands for excessive upfront payments, lack of proper licensing or insurance, and a reluctance to provide references. Now, focus on the green lights: clear, detailed contracts; transparent communication; reasonable payment schedules; robust insurance and licensing; and a willingness to provide multiple, verifiable references. Always verify these details yourself; don't just take their word for it.
The Importance of Vetting
Vetting a new contractor involves more than just getting a few quotes. It means checking their license with your state board, verifying their insurance (liability and workers' compensation), calling their references and actually visiting past job sites if possible, and scrutinizing their online reviews across multiple platforms. Ask about their experience with similar projects, their process for handling change orders, and their warranty on labor. A reputable contractor will welcome this scrutiny because it demonstrates your commitment to a successful project.
| Vetting Step | Action | Importance |
|---|---|---|
| Verify License & Insurance | Check state contractor board & request proof of insurance. | Critical |
| Check References | Call at least 3 recent clients; visit past job sites if possible. | High |
| Review Online Reputation | Check BBB, Google Reviews, Yelp, social media. | High |
| Detailed Contract Review | Ensure clear scope, timeline, payment, warranty, and dispute resolution. | Critical |
| Payment Schedule | Avoid large upfront payments; tie payments to project milestones. | High |
Frequently Asked Questions (FAQ)
Question? Can I withhold payment for poor quality dwelling repair work?
Answer: Generally, withholding payment is a complex issue and should be approached with extreme caution. Your contract usually dictates payment terms. If you withhold payment without proper legal grounds or a contractual right, you could be in breach of contract yourself, leading to liens on your property or legal action from the contractor. It's often best to formally notify the contractor of the issues, request remediation, and if they fail to comply, pursue other dispute resolution methods before unilaterally withholding payment. Always consult a lawyer before taking this step.
Question? Will my home insurance cover the cost to fix poor contractor work?
Answer: As an industry specialist, I can tell you that standard home insurance policies typically exclude coverage for poor workmanship itself. However, if the poor workmanship directly leads to subsequent damage that is otherwise covered by your policy (e.g., a poorly installed roof causes water damage to your ceiling), your policy might cover the cost of repairing the consequential damage. The original faulty repair cost, however, generally remains the responsibility of the contractor or homeowner. Always review your specific policy and consult with your insurer.
Question? How long do I have to report poor workmanship to a contractor or file a claim?
Answer: This varies. Your contract may specify a warranty period for workmanship, often 1-5 years. State laws also have statutes of limitations for construction defect claims, which can range from a few years to over a decade, depending on the type of defect and when it was discovered. For insurance claims related to consequential damage, you typically need to report it "promptly" or "within a reasonable time" as specified in your policy. The sooner you report, the better your chances for a favorable outcome.
Question? What if the contractor refuses to fix the poor quality dwelling repair work?
Answer: If the contractor refuses to address the issues after formal written requests, you'll need to escalate. This typically involves filing a complaint with your state's contractor licensing board, consumer protection agencies, or the Better Business Bureau. You might also pursue alternative dispute resolution like mediation or arbitration if specified in your contract. If these avenues fail, consulting a construction lawyer to explore legal action for breach of contract or negligence would be the next step.
Question? Should I always hire the cheapest contractor for dwelling repairs?
Answer: In my long experience, I've learned that while cost is a factor, hiring the cheapest contractor often leads to the very problems we're discussing: poor quality workmanship, cut corners, and endless headaches. A low bid can signal a lack of experience, insufficient insurance, or a tendency to use substandard materials. It's almost always wiser to seek multiple bids, prioritize value, experience, reputation, and a comprehensive contract over simply the lowest price. Investing a little more upfront can save you significant time, money, and stress in the long run.
Key Takeaways and Final Thoughts
Dealing with poor quality dwelling repair can be an incredibly frustrating and disheartening experience. However, as an experienced industry specialist, I've seen that with the right approach, homeowners can successfully navigate these challenges and protect their investments. Remember, knowledge and meticulous action are your most powerful tools.
- Document Everything: From photos and videos to every piece of written communication, your records are your strongest evidence.
- Know Your Contract: Your contract is your legal blueprint; understand its terms, especially warranties and dispute resolution clauses.
- Communicate Formally: Give your contractor a chance to rectify the issues through clear, written, and deadline-driven communication.
- Engage Your Insurer: While not covering poor workmanship directly, your home insurance might cover consequential damage, offering a crucial safety net.
- Seek Expert Opinions: Independent inspectors or consultants provide unbiased assessments that carry significant weight.
- Explore All Avenues: Don't shy away from mediation, arbitration, or legal counsel when necessary to protect your rights.
- Prioritize Safety: Mitigate further damage and ensure your home is safe for your family, documenting all temporary measures.
The journey to resolve poor quality dwelling repair can be arduous, but by following these structured steps, you empower yourself to demand the quality you paid for and deserve. Don't let a bad contractor diminish the value or safety of your home. Be proactive, be persistent, and leverage the resources available to you. Your home is your sanctuary; fight to keep it that way.
Recommended Reading
- Unlocking Final Expense Insurance: Why Waiting Periods Matter
- Demystifying LTC Partnership Asset Disregard: Your 5-Step Explanation Guide
- 5 Steps to Solving Travel Insurance Issues for Pre-Existing Conditions
- 7 Essential Steps: Fix Network Security for Cyber Insurance Eligibility
- 5 Urgent Steps: Securing Health Insurance During Your Job Transition





Your email address will not be published. Required fields are marked *